*Disclaimer*
I use a yellow/orange tinted colour filter on my screen. It doesn't affect the actual footage, it is just something that helps with my vision. However, most screenshots are affected by the filter, meaning that evidence of editing may look different to the footage in the final product. To try and combat this somewhat, I was able to export frames that weren't affected by the filter, but this isn't an option when evidencing techniques and settings used.
Camerawork
During production, I decided to use multiple cameras when filming the interviews. Camera 1 filmed from a straight-on angle and Camera 2 filmed from a side-angle. I did this to provide some variation in the final edit, making the film more engaging and interesting to watch. One thing I considered during both production and post-production was the interviewees positioning on screen. The 'rule of thirds' is a technique often used in the film industry as framing the subject on the intersecting lines is considered more pleasing to the eye. I used two cameras to capture multiple angles during the interviews. Camera 1 was positioned in a way that centred the subject in the frame, and Camera 2 was positioned the same but from a side-on angle. In editing, I adjusted the zoom and positioning of the footage captured on Camera 2 to place the interviewees on the left side of the screen (the left third). I kept the footage from Camera 1 centred on screen as this made the shot balanced and symmetrical. I chose to do this as the symmetry forces audience attention to the centre of screen, adding emphasis to the things being said. However, centring the subject can make the shot seem flat and dull. To combat this I used the alternate angle from Camera 2 to offset the interviewee in line with the rule of thirds, maintaining the emphasis of the centred shots from Camera 1 by using the variation to prevent boredom.
Using Multiple Angles
 |
| Aligning Clips |
 |
| Ovie's Interview |
I started by lining up the footage by matching the peaks on the audio tracks and then checking one tracks footage with the opposing audio to see if they matched.
I then cut the footage and moved the other angle to a separate track where I could disable the footage and audio without having to delete it. This meant I could always change my mind or alter the length of clips with having to re-align the footage.
I then did the same for Harry's interview footage.
 |
| Harry's Interview |
I then interweaved the different interview footage, making sure that the camera angles matched and worked well together.
I also changed the overlap of some clips so that the audio for the next interview would begin before the subject appeared on screen. I did this to ease in and out of each interview smoothly.
 |
| Interweaving Interviews |
 |
| Final Timeline |
I then merged the tracks once I was happy with the angles in order to make it easier to add transitions between clips.
 |
Merged Interview
|
Footage Composition
For the interviews, I had one interviewee sat behind a desk, and the other sat on a sofa. This was to give the illusion that they were in two different locations. Having the interviewee sat on a sofa gave a casual feel to the interview, making them seem more relatable to the audience. In comparison, having the other behind a desk makes them seem more factual as it gives the appearance that the interview is being filmed in a professional setting, making the interviewee appear more factual, therefore reliable. By having two differing styles of perspective, it makes the audience believe that varying opinions were considered before filming. This makes the overall findings of the documentary more believable as two different types of interviewees, professional and casual, are seen to be in agreement, validating their statements.
Interview 1 - Ovie Walawalkar
 |
| Zoom After |
 |
| Zoom Before |
To apply the same transform settings to each corresponding clip, I used the "ALT-V" feature to bring up the 'paste attributes panel'. This allowed me to select what clip settings I wanted to paste and which I didn't, making it faster and easier to apply the zoom to all correct clips.
Zooming in the footage resulted in the subject having a closer proximity to the camera, this helps the audience relate them as the physical closeness can also be seen as a metaphorical closeness. I used the "rule of thirds" as a guide when making adjustments. Typically, the subject's body is lined up with a vertical line, and their eye's with a horizontal line. I framed my subject not quite perfectly on the lines as doing so left too much empty space on the screen.
B-Roll
 |
| Before Editing |
Whilst filming this clip one of the tripod legs hadn't been set-up properly, resulting in the footage having a slight list to the right.
 |
| After Editing |
To fix this, I used the transform settings to rotate the footage so that it would look more even, and zoom in slightly to make the shot less wide.
Lighting
Soft Box Lighting
I chose to use soft boxes as my light source because of the connotations they hold. Soft boxes are conventional to the documentary genre as they diffuse soft light, making the shot appear more natural as the light only enhances what is already visible. Additionally, the soft shine contrasts the harsh lighting typically found in fictional film, giving the documentary a raw and realistic feel. As the footage seems natural in comparison to lighting styles in fictional films, the audience is more likely to trust and relate to the subject on screen, because the removal of fictionally connoted qualities reinforces the factual nature of the documentary.
Soft boxes are often used in documentaries, specifically during interviews, as the intention of the genre is to inform others about a certain topic, not necessarily to entertain. This means the use of soft boxes minimises the cinematic style of other genres. By doing this, the documentary appears more factual and trustworthy as the style synonymous with fiction is sparsely used. It was my intention to make the interviewees appear as trustworthy as possible, therefore, taking the connotations associated with soft boxes into account, I felt that they would be the best choice of lighting when filming my short film. Furthermore, lighting is often used to evoke certain feelings from the audience. By having a scene be bright and well lit, connotations of openness and truth are conveyed to the audience, helping them better connect with those on screen. This made it so the things my interviewees discussed during the documentary appear more factual and/or believable, making my film seem more professional.
Colour Correction & Grading
 |
| Adjustment Clips |
To easily apply the same settings to each individual clip, I used the adjustment clip feature offered by DaVinci Resolve. By applying the corrections to the clip, I was able to create specific settings for the four different cameras much faster than if I had edited each clip individually. I labelled the adjustment clips with the subject's initials, and the camera angle to make it easier to place the correct one.
I wanted the footage to seem more natural in comparison to a typical film. I decided to do this as documentaries are factual and cover stories/events that exist in reality. Therefore, by only making minor changes to the footage, I was able to avoid a cinematic style that is typically associated with fiction film. This highlights the non-fiction topic of the documentary as a more 'unedited' style gives credibility to the things being said as all fictional connotations are removed. The audience is expected to trust what is said in the documentary, meaning that the people on screen will need to seem relatable, and in some sense, ordinary. I helped foster connection between those on screen and the audience by increasing the hue and saturation of the footage, helping separate the subject from the grey backdrop. This presents the subject as more trustworthy as being clearly visible on camera removes any connotations of mystery or deception.
Interview 1 - Harry Kirkland
When colour grading the footage from Harry's Interview, I wanted to make the grey backdrop seem less dull make the colours more vibrant in order to separate the subject from the background; this was to make them more distinct on screen. To do this I increased the hue, saturation, and temperature, applying warmer tones to the footage. I also slightly decreased the contrast to make the background stand out less to help make the subject the clear focal point of the shot.
 |
| Front Camera - After |
 |
| Front Camera - Before |
 |
| Side Camera - After |
 |
| Side Camera - Before |
 |
| Colour Wheels |
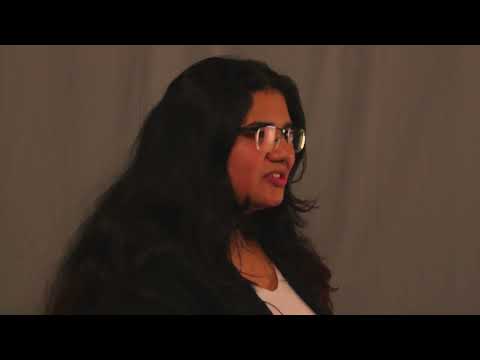
Interview 2 - Ovie Walawalkar
When colour grading the footage from Ovie's Interview, I wanted to make the grey backdrop seem less dull make the colours more vibrant in order to separate the subject from the background; this was to make them more distinct on screen. To do this I increased the hue, saturation, and temperature, applying warmer tones to the footage. Moreover, I increased the tint of the footage to bring out the green of the sofa to create a clear divide between the subject and the background. I also slightly decreased the contrast to make the background stand out less to help make the subject the clear focal point of the shot.
 |
| Front Camera - After |
 |
| Front Camera - Before |
 |
| Side Camera - After |
 |
| Side Camera - Before |
 |
Colour Wheels
|


No comments:
Post a Comment