Friday, 1 March 2024
LO5: Analysis of Post-Production Techniques
*Disclaimer*
I use a yellow/orange tinted colour filter on my screen. It doesn't affect the actual footage, it is just something that helps with my vision. However, most screenshots are affected by the filter, meaning that evidence of editing may look different to the footage in the final product. To try and combat this somewhat, I was able to export frames that weren't affected by the filter, but this isn't an option when evidencing techniques and settings used.
LO4: Setting Up Camera & Lighting Equipment
Setting Up Equipment
Equipment Used:
- DSLR (x3)
- 4k Camera (x1)
- LED Light Box
- Samsung Galaxy Note 20
- Google Pixel 6a
- iPhone 12
- Tripod (x3)
- Lavaliere Microphone
Explanation
During the first shoot with Ovie, the Lav Mic and the 4k Camera wouldn't work so we ended up recording audio and visual footage on our phones. The visuals were recorded on the Samsung, and the audio was recorded on two devices (Google Pixel and iPhone) in case the file corrupted. In the second shoot with Harry, the Lav Mic and 4k Camera worked and so we used those instead of phones. We also added additional DSLRs to give us more angles to work with whilst editing.
Josh's House - B-Roll Capture

UTC Sheffield City Centre [Studio 2] - Interview Footage
We set up multiple cameras during Harry's interview. One was facing directly at him, the other was at a 45 degree angle, and the third was set up to capture a close up of the activities taking place on the desk. During the second half of the shoot, Jed walked around with the camera capturing behind the scenes and b-roll footage whilst we were interviewing. Having multiple angles and shot types will allow me to have a professional and interesting looking short film.


Sheffield City Centre
When shooting the b-roll in the city centre we only used one tripod and one camera as the intention of the shoot was to capture timelapses meaning we only needed the one camera. We also brought spare batteries so we could capture more footage without the risk of the camera dying.


LO4: Rushes
Rushes
Rush Log


Conventions
Lighting & Camera Settings
Lighting
During filming I used soft boxes as the primary light source. I chose to use soft boxes as they conventional to the documentary genre. Soft boxes do not drastically change the look of the footage, and therefore are a common choice for documentaries. This is because documentaries are not supposed to be cinematic fiction, but rather an educational discussion of information. Two soft boxes were used; one key light and one back light. The key light helped to make sure the subject was distinctly visible on camera, and the back light was used to prevent a large shadow being cast on the set, keeping the entire shot well lit.
When filming b-roll, I relied on the sun as the primary light source. I chose not to manipulate the footage by using artificial light sources as I wanted to maintain the natural look I was intending to capture.
Frame Rate & Shutter Speed
When filming both the interviews and the b-roll, the industry standard frame rate and shutter speed were used - 24fps & 1/48ss. Typically, shutter speed is double that of the frame rate as it reduces the risk of motion blur and produces a high image quality. Therefore, I decided to follow this convention for my short film.
Composition
When filming both the interviews and the b-roll, I decided to follow the rule of thirds when lining up my shots. I applied the rule by using the 3x3 grid on the camera screen and by positioning the subject to be sat in the centre third for the straight angle, and on the line between the left third and the centre third for the side angle. The horizontal lines typically align with the eyes of the subject; this helps to correctly frame the subject and make the final product look more professional.
Comparing Rushes to Storyboard & Influences
For the interviews I used a two camera set-up and soft boxes as a light source to make it conventional to the documentary genre. Documentaries typically use multiple angles to keep the film varied and interesting to watch. Moreover, the soft boxes are conventional as the diffused light gives a more natural look to the footage. The soft box lighting also mimics the lighting used in the existing products that have influenced my work. In addition, the camera setting used were also conventional to the genre. Industry standard frame rate is 24fps with the shutter speed typically being double that of the frame rate, therefore, I used a shutter speed of 1/48. The aperture was set to f/8 as I felt that this gave the footage a depth of field that didn't leave the background too blurry, but left it slightly out of focus in comparison to the subject in order to highlight the interviewee as the focal point of the shot.
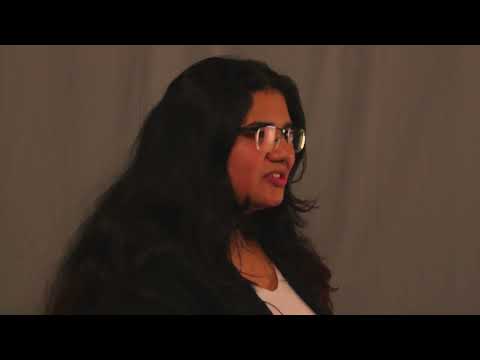
Harry's Interview
In the storyboard, I planned for the shot to be a medium close-up, however, I feel that the shot came out closer to a medium shot than a medium close-up. Although the final shot came out different from the planned shot, I feel like it ultimately fit the conventions of the genre better as it better mimicked the style of the existing products. Furthermore, continuing to mimic the style of the existing products, I applied the rule of thirds when aligning the cameras. This helped to make the film fit the conventions of the genre and look more professional.
 |
| Harry Interview - Side Angle |
 |
| Storyboard - Harry Interview - Side Angle |
Shot Duration: 25-30 Seconds
Shot Type: Medium Close-UpLocation & Time of Day: Studio/Classroom - Day
Description: A side angle shot of Interviewee 2 (Harry) discussing representation in film and tv.
Dialogue: Interviewee 2 discussing representation in film and tv.
Sound/Music: n/a
Editing Technique: Straight Cut
VFX & SFX: n/a
 |
| Influence - Interview - Side Angle |
Ovie's Interview
In the storyboard, I planned for the shot to be a medium shot, however, I feel like the shot came out closer to a medium close-up rather than a medium shot. Although it was not the original intention, I feel like this better fits the genre as it mimics the shots seen in the existing products that have influenced my work. Furthermore, similarly to Harry's interview, I also used the rule of thirds when positioning the camera angles for Ovie's interview. I did this as the rule of thirds is an industry standard practice for making the shot composition look professional.
 |
| Ovie Interview - Straight Angle |
 |
| Storyboard - Ovie Interview - Straight Angle |
Shot Type: Medium Shot
Location & Time of Day: Studio/Classroom - Day
Description: A straight on shot of Interviewee 1 continuing to discuss representation in film and tv.
Dialogue: Continuation of discussion about representation in film and tv.
Sound/Music: n/a
Editing Technique: Straight Cut
VFX & SFX: Name Card - Presenting the Interviewee's name & occupation.
 |
| Influence - Interview - Straight Angle |
LO4: Influences
Lighting
I chose to use a soft box when filming the interviews as soft boxes are often used in documentaries. Soft box lighting achieves its gentleness by diffusing the light through a screen. The inside of a soft box is lined with aluminium foil, or another alternative, to efficiently reflect the light from the bulb. By diffusing the light it gives the subject a more natural look. This can make a character appear more trustworthy as they come across as more relatable due to their normal composition. Soft boxes are often used in documentaries, specifically during interviews, as the intention of the genre is to inform others about a certain topic, not necessarily to entertain. This means the use of soft boxes minimises the cinematic style of other genres. By doing this, the documentary appears more factual and trustworthy as the style synonymous with fiction is sparsely used.
It was my intention to make the interviewees appear as trustworthy as possible, therefore, taking the connotations associated with soft boxes into account, I felt that they would be the best choice of lighting when filming my short film. Furthermore, lighting is often used to evoke certain feelings from the audience. The existing products I have taken inspiration from had their scenes bright and well lit, making the interviewees clearly visible on screen. By having a scene be bright and well lit, connotations of openness and truth are conveyed to the audience, helping them better connect with those on screen. This made it so the things my interviewees discussed during the documentary appear more factual and/or believable, making my film seem more professional.
 |
| Existing Product 1 - Lighting |
 |
| Existing Product 2 - Lighting |
 |
| My Film - Lighting |
Shot Composition
For the interviews, I had one interviewee sat behind a desk, and the other sat on a sofa. This was to give the illusion that they were in two different locations. Having the interviewee sat on a sofa gave a casual feel to the interview, making them seem more relatable to the audience. In comparison, having the other behind a desk makes them seem more factual as it gives the appearance that the interview is being filmed in a professional setting, making the interviewee appear more factual, therefore reliable. By having two differing styles of perspective, it makes the audience believe that varying opinions were considered before filming. This makes the overall findings of the documentary more believable as two different types of interviewees, professional and casual, are seen to be in agreement, validating their statements.
One thing I considered during both production and post-production was the interviewees positioning on screen. The 'rule of thirds' is a technique often used in the film industry as framing the subject on the intersecting lines is considered more pleasing to the eye. I used two cameras to capture multiple angles during the interviews. Camera one was positioned in a way that centred the subject in the frame, and Camera two was positioned the same but from a side-on angle. In editing, I adjusted the zoom and positioning of the footage captured on Camera two to place the interviewees on the left side of the screen (the left third). This technique can be seen in both existing products exampled below. I kept the footage from Camera one centred on screen as this made the shot balanced and symmetrical. I chose to do this as the symmetry forces audience attention to the centre of screen, adding emphasis to the things being said. However, centring the subject can make the shot seem flat and dull. To combat this I used the alternate angle from Camera two to offset the interviewee in line with the rule of thirds, maintaining the emphasis of the centred shots from Camera one by using the variation to prevent boredom.
 |
| Existing Product 1 - Shot Composition 1 |
 |
| Existing Product 2 - Shot Composition 1 |
|
| My Film - Shot Composition 1 |
|
| Existing Product 1 - Shot Composition 2 |
|
| Existing Product 2 - Shot Composition 2 |
 |
| My Film - Shot Composition 2 |
LO3: Risk Assessment & Recce
Recce

Risk Assessment
Sheffield City Centre

UTC Sheffield City Centre - Studio 2


LO3: Annotated Script
Annotations
 |
| Montage - Page 2 |
 |
| Interview B-Roll - Page 3 |
 |
| Interview B-Roll - Page |
 |
| Montage - Page 6 |
Script


LO3: Set Design
 |
| Studio 2 - Interview. Harry Kirkland |
 |
| Studio 2 - Interview. Ovie Walawalkar |
To film the interviews I will be using two DSLR cameras and two Soft Boxes. I have decided to use two cameras as I want to capture a side-on angle of the interviews. This is because documentaries usually include two or more camera angles for the interviews as it helps keep the audience more engaged. I have also chosen to use a softbox set-up for the lighting as they are conventional to the genre. Both soft boxes will be placed at an angle, one at more of an angle than the other. The soft box with a more straight-on angle than the other will be used as the key light and the other will be used as a back light. This will help create an even distribution of light on set, making the final footage seem more professional.
Both cameras will shoot at an fps of 24 and a shutter speed of 1/48. I have chosen these settings as 24fps is the industry standard and shutter speed is typically double the fps, therefore I will choose 1/48 when shooting. In addition, I will most likely use an aperture of either f/8 or f/11 as I believe they produce a nicely balanced depth of field. With an aperture of f/8 or f/11, the background won't be completely blurred, making the subject stand out unnaturally on screen, but will be slightly out of focus in comparison to the subject, making them the obvious focal point.
The two interviews will have slightly different set-ups despite being filmed in the same location. This is to give the appearance that they weren't filmed in the same place in order to add some variety. Moreover, by having sets unique to the interviewee, it will help give the interviewees a sense of individuality.
LO3: Storyboard

Shot 1
Shot Duration
15-20 Seconds
Shot Type
Medium Shot
Location & Time of Day
News Room - Day
Description
A news presenter is speaking about diversity in film and tv. The camera slowly zooms out to add dramatic effect.
Dialogue
A news report on diversity in film and tv.
Sound/Music
Music will fade in with the clip and will be quiet as to not overwhelm what is being said by the news reporter.
Editing Technique
There will be a j-cut for the transition to the next scene as I want to begin to layer in multiple news report audios on top of each other.
VFX & SFX
N/A
Shot 2
Shot Duration
10-15 Seconds
Shot Type
Wide Shot
Location & Time of Day
N/A
Description
The news reports continue zooming out, overlapping with each other until eventually the entire screen is filled with myriad of different news clips.
Dialogue
Overlapping news reports about diversity in film and tv.
Sound/Music
The same music is still playing quietly as to not draw focus away from the news clips.
Editing Technique
Straight Cut
VFX & SFX
The clips zoom out to form the title card.
Shot 3
Shot Duration
5-10 Seconds
Shot Type
Wide Shot
Location & Time of Day
N/A
Description
The news clips continue to zoom out eventually forming the title card. All moving images cease as the title card solidifies.
Dialogue
N/A
Sound/Music
The music comes to an abrupt end to place emphasis on the title card.
Editing Technique
Fade to black before the next scene begins.
VFX & SFX
Title card
Shot 4
Shot Duration
5-10 Seconds
Shot Type
Establishing Shot
Location & Time of Day
City Road - Day
Description
The shot fades into a timelapse of people going about their daily lives as the voiceover begins.
Dialogue
The narrator begins talking about diversity in film and tv as a way of introducing the topic of the documentary.
Sound/Music
A new music track slowly fades in along with the shot and plays quietly, complimenting the voiceover.
Editing Technique
Straight Cut
VFX & SFX
N/A
Shot 5
Shot Duration
5-10 Seconds
Shot Type
Medium Shot
Location & Time of Day
Classroom - Day
Description
The camera pans across a computer room as the narrator continues talking.
Dialogue
The narrator continues introducing the topic of the documentary.
Sound/Music
The same music continues, not getting louder or quieter.
Editing Technique
Straight Cut
VFX & SFX
N/A
Shot 6
Shot Duration
5-10 Seconds
Shot Type
Medium Close-Up
Location & Time of Day
Classroom - Day
Description
The camera cuts to be in front of one of the computers, slowly zooming towards the screen. On the screen is a video of an awards show, most likely the Oscars.
Dialogue
N/A
Sound/Music
The same music continues, not getting louder or quieter.
Editing Technique
Straight Cut
VFX & SFX
N/A
LO3: Treatment
Working Title
The Shift
Genre
Documentary
Target Audience
All age groups - mostly between 14 and 50 as I don't think anyone younger or older would understand the content of the documentaries enough to interest them.
Brief
My documentary is going to be an episode that is a part of a series surrounding social media and it's impacts on society. My episode will be centred around the rise in diversity in the media industry and products, whilst exploring both sides of the arguments surrounding it. In the episode, I will explore why and how things have changed so rapidly over the last few years, and will interviews various people to gain there opinions about the topic. I will also use data gathered from an online survey to show the broader, more generalised, opinions of the wider population. Both the survey and interviews will contain potentially provocative statements about diversity and representation, and will ask each respondent to offer information about their age, race, sexuality, disabilities, and geographical location. I am hoping to find connections between certain demographics and how they respond to the statements, and whether or not they could be bothered/were comfortable enough to expand on the agreement/disagreement with the statements.
Equipment
- DSLR Camera
- 4K Camcorder
- Attachable Microphone
- External Light Source
- 4K Action Camera
- Computer
- Editing Software (Da Vinci Resolve)
Personnel
Director & Producer = Myself
Camera Operator = Joshua Rackham & Myself
Actors (voiceover) = Josh Rackham
Editor = Myself
Reasoning
I have chosen to create this documentary as I enjoy researching and collecting data about topics that interest me. I came up with the idea whilst watching a movie and noticing how much more diverse it was compared to things I watched as a child. I was curious to find out why such an immediate change was made in such a short space of time. I wanted to explore the idea further by asking a wide range of people from all demographics their opinions on diversity, and the increasing amount of representation in blockbuster productions. I want to share my findings with others as I really love learning things and then teaching other people about it.
Time Scale
I want to begin filming by the end of September and finish by October 11th to allow myself adequate time to edit and re-shoot. I've allowed myself a long time to shoot so that I can make sure the b-roll is as good as it can be, and the a-roll has the correct lighting/composition.
Contingency Plans
In the event that filming plans fail, I can fine tune the script and go over everything again just to make sure it's good. I can also record any voiceovers that have been added after production stars. By giving myself this much time, it will create more filming dates in the event the actor is unavailable. I am also going to bring a spare SD card in case my current one runs out of space or breaks somehow.
Legal and Ethical Constraints
One legal constraint would be that I have to gain permission from anyone captured in the b-roll or in the interviews. I will ensure that any person filmed in either the background or the foreground of any footage has signed a release & consent form, allowing me to share the footage however I please.
One ethical constraint would be the data collected in the research survey. Some of the questions ask for personal opinions regarding that people may not be comfortable sharing. To combat this constraint I have added a disclaimer at the start of the survey, and again when at the start of what I believe to be the most personal part of the survey. Each questions has the option not to be answered, so if the responder is not comfortable, they can move on to the next question.
Another legal constraint is that I cannot collect and share data from anyone under 13 without parental consent. To solve this problem, I am simply not collecting data from anyone under 13. The start of the survey asks for the respondents age, and there is no option lower than 14. I will avoid sending the survey to anyone I know to be under 13, and will have to trust that anyone who comes across the survey will know not to answer if they are under 13.
Another ethical constraint would be that minors are given access to the survey. In the disclaimer I specify not to include any information that could reveal the responders identity, and in the even a child does not understand or does not read the disclaimer, I will delete any responses that reveal identifying information.
LO2: Lighting Effects & Set-Up
Three Point Lighting
Three Point Lighting consists of a Key light, a Fill light, and a Back light. Each light shines from a different angle with the intention of highlighting different parts the subject. The Key light shines directly on the subject with the strength, colour, and angle of the Key determining the overall lighting design. When filming in outdoor spaces, the sun is often used as the Key. The Fill light shines on the subject from a side angle and is often placed in a lower position to that of the Key. It balances the lighting by illuminating shaded surfaces, lessening or eliminating the effects of Chiaroscuro. A piece of white card can be used as a Fill by reflecting light from the Key. If a stark contrast is desired, it's recommended to leave out the Fill. The Back light shines on the subject from behind, giving the subject a rim of light separating them from the background. As the Back light distinguishes the subject from the background, not using one may impose connotations of mystery and darkness as the audience has a harder time connecting with the character. Moreover, if a director wants the audience to connect with a character, the use of Three Point Lighting can be effective as the increased visibility makes the audience more likely to engage with them due to their strong visibility holding connotations of openness and trust.

Chiaroscuro
Chiaroscuro creates a strong, bold contrast between light and dark that usually affects the overall composition. The technique is used to give three-dimensional qualities to an image on a two-dimensional plane. Chiaroscuro was popularised in the 1940s and is often used in Horror, Drama, and Film Noir genres. The lighting is often used to convey emotion in film with the interplay of light and shadow representing the inner turmoil or moral ambiguity of a character. By using Chiaroscuro, filmmakers are able to engage audiences more effectively, drawing them deeper into the story. In Film Noir, a style synonymous with crime and mystery, Chiaroscuro is used to portray the moral ambiguity of a character. In Horror, the technique is used to amplify tension and create terrifying visuals; the shadows prey on the human fear of the unknown by implying there is something hiding within them. In Drama, Chiaroscuro is often used to accentuate pivotal moments and heighten the emotions of a scene.

Soft Box
Soft Box lighting achieves its gentleness by diffusing the light through a screen. The inside of a soft box is lined with aluminium foil, or another alternative, to efficiently reflect the light from the bulb. By diffusing the light it gives the subject a more natural look. This can make a character appear more trustworthy as they come across as more relatable due to their normal composition. Soft Boxes are often used in documentaries, specifically during interviews, as the intention of the genre is to inform others about a certain topic, not necessarily to entertain. This means the use of Soft Boxes minimises the cinematic style of other genres. By doing this, the documentary appears more factual and trustworthy as the style synonymous with fiction is sparsely used.


LO1: Using Camera Equipment to Record Cinematic Quality Footage
DSLR
ISO
ISO controls the sensitivity of the camera's senor to light. Alongside aperture and shutter speed, ISO affects the exposure of an image. Increasing the ISO will make the image brighter, helping to capture higher quality footage in a low-light setting. Although, a higher ISO can make the footage appear grainy, reducing it's overall quality.
Aperture
The aperture is the part of a camera that can be adjusted to let in more or less light. The smaller the aperture, the less light that'll be let in, resulting in a darker image. The bigger the aperture, the more light that'll be let in, resulting in a brighter image. If the aperture is too large or small it can over or under-expose the footage, leaving it unusable. Aperture can also be used blur or sharpen backdrops/landscapes.
Shutter Speed
The shutter speed affects the rate at which the shutter of a camera closes. A faster shutter speed creates a shorter exposure, making an image sharper and more defined, and a slower shutter speed creates a longer exposure, meaning anything that moves whilst the shutter is open will look blurred to varying degrees depending on the length of exposure.
Image Quality
The image quality of a camera dictates the level of accuracy in which the camera captures, processes, and stores footage. Image quality is affected by the camera's resolution, ISO, and other settings. Some cameras will have a better resolution than others, making their footage look nicer than others.
Lenses
Standard Lens
A standard lens, also known as a "normal" lens, has a similar angle of view to the human eye. This makes the footage seem more natural as it produces an image that matches what we see. The lens is capable of capturing high-quality footage across a versatile range of landscapes and environments.
Telephoto Lens
A telephoto lens has a longer focal length than a standard lens, yielding a magnified image and a narrow field of view. A telephoto lens allows you to photograph a subject that is far away. Typically, a lens is considered "telephoto” if its focal length is 60mm or longer.Fish Eye Lens
A fisheye lens is an ultra wide-angle lens that produces strong visual distortion intended to create a wide panoramic or hemispherical image. Fisheye lenses achieve extremely wide angles of view, well beyond any rectilinear lens.Effects
CPL Filter
A CPL (circular polarizer/linear) filter is placed on the end of a camera lens and is used to reduce reflections, atmospheric haze, and increase saturation. This can make the footage seem higher quality as the filter applies an almost cinematic look. The filter's ability to reduce glare and reflections in windows can guarantee that the intended subject of the footage is not obscured by reflections of external objects. It also makes sure that no reflections of the production team can be seen, as if they were it would draw away from the professionalism of the project.
ND Filter
An ND (neutral density) filter is used to reduce the amount of light reaching the camera's sensor. Doing so allows the photographer to select combinations of aperture, exposure and sensitivity that would otherwise produce overexposed pictures. This is done to achieve effects such as a shallower depth of field or motion blur of a subject in a wider range of situations and atmospheric conditions. The filter does not change the colour of the light being captured, only makes it darker.
Sony 4K Camera
Depth of Field
The depth of field (DOF) is the distance between the nearest and the furthest objects that are in acceptably sharp focus in an image captured with a camera. The depth of field can be determined by focal length, distance to subject, and aperture. Limitations of depth of field can sometimes be overcome with various techniques and equipment.Filming
Sony 4K Cameras offer a lot of features that may not be found in other video cameras. For example, the Sony 4K has dual SD media slots, allowing for three recording options, simultaneous, relay, and independent. This gives filmmakers a variety of options to choose from, helping to elevate the quality of their films. The Sony 4K also offers dual video recording, meaning filmmakers can record footage in both high and low quality simultaneously. This allows for quick sharing of footage due to the low quality resulting in a smaller file size, and also for high-quality editing.
White Balance
White Balance is an adjustment in electronic and film imaging that corrects for the colour balance of the lighting, so that white objects appear white, rather than coloured yellow when lit by tungsten filament lights, or excessively blue under sunlight. Most digital cameras have automatic compensation for white balance, and the more advanced allow some manual adjustment, either to fixed settings or balancing on a particular image. The white balance is adjusted by applying different weightings to the red, green and blue (RGB) components of the image coming from the sensor, based on the colour temperature. The Sony 4K offers both automatic and manual white balance adjustment which can be changed in settings.Drone
Filming
Drone integration into filmmaking has opened up new horizons for storytellers. Drone usage in the film industry is not just limited to cinematography, but also includes location scouting, crowd control, and light rigging, further underscoring their versatility. Drone significantly cut down on filming related costs as shots that were originally filmed with a helicopter, can now be shot with a drone. Drones used for filming typically have a small, high-quality camera attached to the underside of the drone's body with all footage captured being projected back to a small screen handled by the drone operator.Video Quality
Drone video quality can vary based on the make and model. Higher-quality cameras can usually be found on more expensive drones. This is due to the fact that those cameras are likely to be bigger than those that capture low-quality footage, meaning the drone will have be larger and more powerful to account for the increased camera weight. The video quality is typically adjusted through software that comes with the drone. Remote settings are used to try and keep the drone as light as possible, helping it stay in the air longer as it uses less power.
Shoulder Mount
Set-Up
For small hand-held cameras, a harness or contoured frame steadies the camera against the photographer's body. In some models, the camera mount is on an arm that protrudes in front of the photographer; beneath the camera is a handle grip. Another variation positions the camera atop a fulcrum brace against the photographer's chest or abdomen. To compensate for the movement of the camera operator, a stabiliser is used to keep the camera level.
A camera shoulder brace stabilises by shifting the weight of the camera to the operator's shoulder. This allows for smoother shots than might be obtainable by handheld operation. Camera shoulder braces are typically padded for comfort and allow the attachment of zoom controllers, transmitters, and other devices. The operator generally holds two handles while a third brace rests on the shoulder. A remote LANC zoom controller is usually placed on one of the handles.
Uses & Functions
Using a shoulder mounted camera is great way to capture footage from a narrative view. It puts viewers directly into the heart of the action; much like a disembodied spectator and it allows the art of voyeurism to be carried out from directly where you want it to be seen. The rapid, yet still controlled, movement of the camera can also help build the energy of the scene, adding an extra frantic touch to what would otherwise be a mildly heated moment.
Subscribe to:
Comments (Atom)
-
 *Disclaimer* I use a yellow/orange tinted colour filter on my screen. It doesn't affect the actual footage, it is just something that he...